Basic tools used in decorating a cake
In this beginner’s guide to Cake design tools, we are going to learn the essential baking decorating tools, their pictures, and as well as their various uses in frosting a cake. We would also be able to know how to frost a cake after getting acquainted with how to use cake decorating tools.
Just like having the right cake ingredients will ensure you get a great-tasting cake, having the right tools helps to ensure you end up with a great-looking cake too! There are so many fun tools and gadgets you could spend your money on, but you don’t need all of them to get started.
It is recommended that you read our article on how to bake a vanilla cake or how to bake a chocolate cake before reading this.
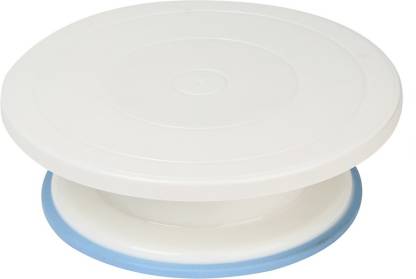
1. Turntable
A turntable allows you to easily decorate cakes Ideal for borders, icing, combing, leveling, etc Rotating Turntable by 360 allows you to easily decorate the cakes which are Ideal for icing, borders, combing, leveling and other decoration works. The cake-decorating turntable makes it simple to decorate professional-looking desserts cakes at home that are suitable for various other baking-related tasks like making desserts, pies, muffins, and many more.
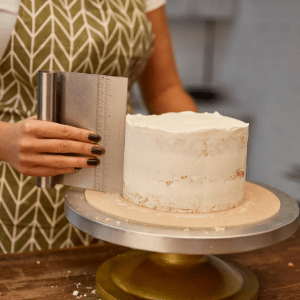
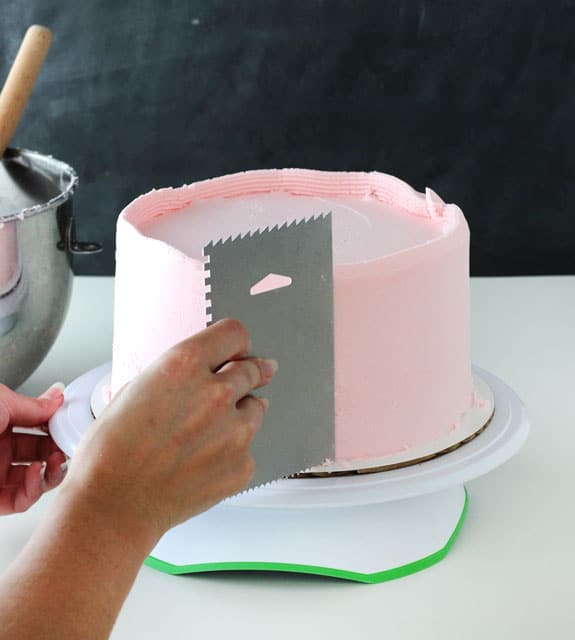
2. Cake scraper
A cake scraper is an essential tool for ensuring nice sharp clean edges on your cakes.
It allows you to give a unique and innovative design to your cakes, pastries, fondant, and all other baking preparations.
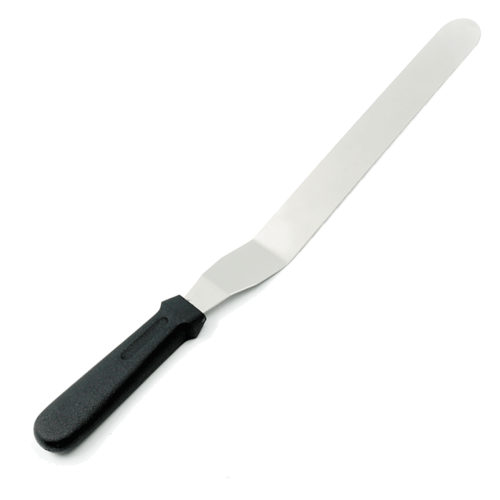
3. Icing spatula
The cake spatula is your favorite tool when decorating a cake serving multiple purposes. Icing, frosting, or separating layers, the spatula always helps. It is a must-have tool for beginners or even the pros.
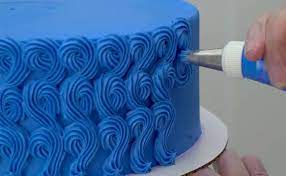
4. Piping nozzle
Flowers and designs on the cakes are as a result of this wonderful tool called icing piping? The purpose is served using piping nozzles or piping tips. They are used for designing and decoration on the ice caked, for making flowers as well as necessary designs on the cake.
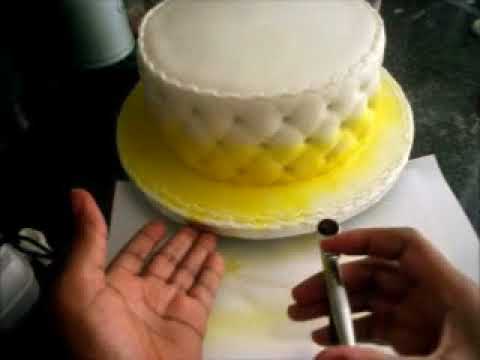
5. Cake airbrush
A cake airbrush is a wonderful asset one can use to decorate cakes. You can use it to color the icing on the cake itself, instead of coloring all that icing or fondant. You can use it to draw images on the cake, color your flowers, spray on some clouds, grass, etc. using stencils and other techniques.
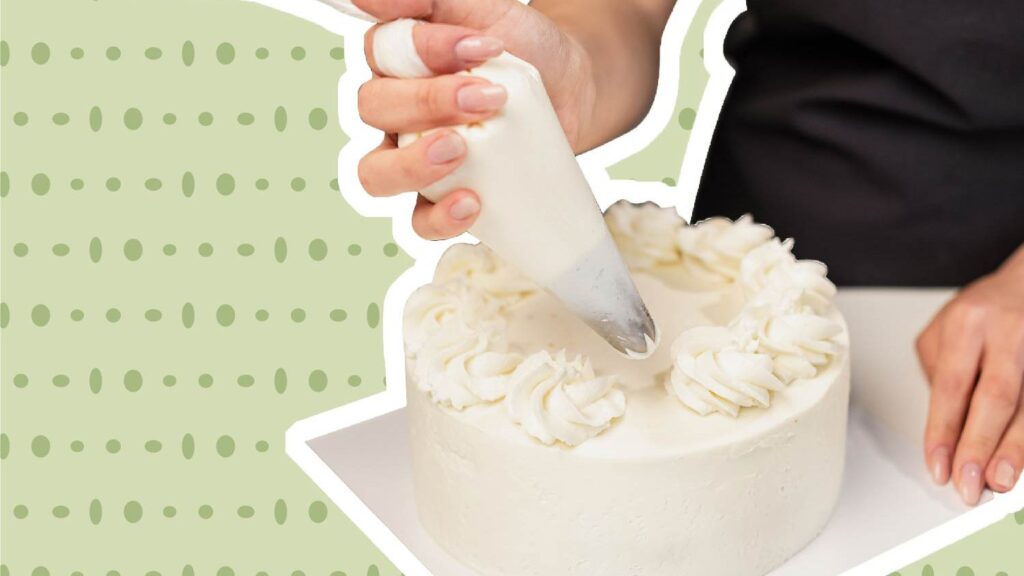
6. Piping bags
A piping bag (also called a pastry bag) is a bag in the shape of a cone that can be used for decorating cakes, cookies, and pastries. Piping bags help create beautiful designs with special metal tips that make it easy to decorate cakes, cookies, or other desserts.
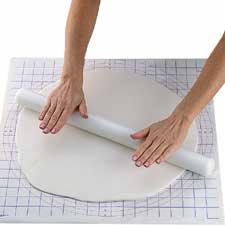
7. Fondant Rolling Pin
A must-have tool for easier cake decorating, this rolling pin is versatile. The plain rolling pin is ideal for rolling out even sheets of fondant or rolling out pastry dough, cookies, pie crusts, or even craft clays.
8. Gum paste tools
Gum paste tools are designed to help you use gum paste to make flowers and other shapes. They consist of a few different types of tools that you will want to have when decorating your cake to make working with gum paste as easy as possible. Gum paste tools are cake decorating tools that are used to work on gum paste, pastillage, fondant, and modeling chocolate. With these tools, you can create and sculpt all types of edible artwork on cakes.
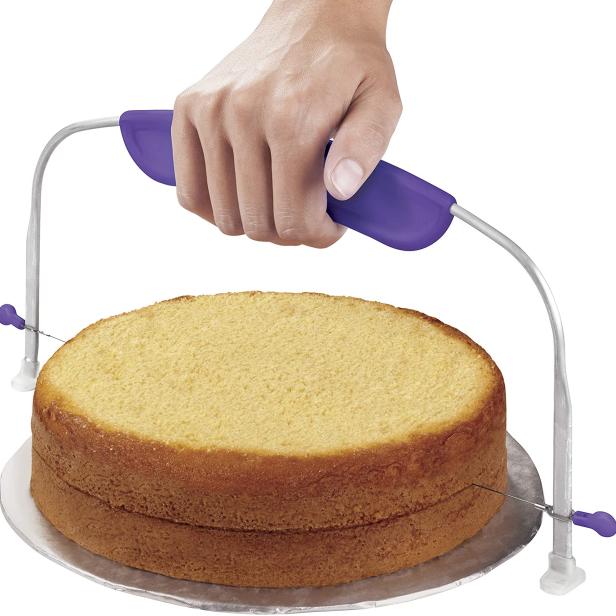
9. Cake leveler
Leveling the cake refers to removing that dome so that the top of the cake is flat.
A cake leveler is a tool that is used to slice off just the dome of a cake, giving you a nice, flat surface to begin stacking and decorating.
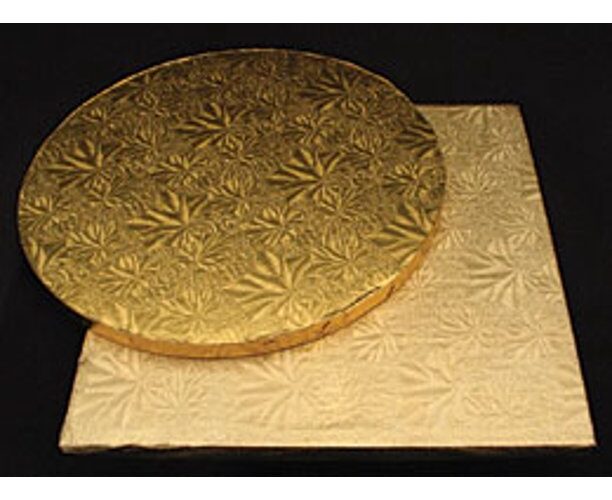
10. Cake board
A cake board is a thick piece of material designed to support cakes or even cupcakes to improve your presentation and make transportation easier. They could also be used as a display board, but only for a smaller and lighter cake. Baseboards are useful when decorating and moving cakes, which is why you need to use one under each cake tier. If you don’t use a cake board under your cake, there is a high chance that when you move the cake around, it will crack and ruin your cake.
While we have been able to list the must-have decorating tools for cake design, there are still many nice-to-have tools that you will need in your cupboard with time. Many tools are still out there that you will add to the list to improve your cake experience.
Now that we have been able to take you through these cake design tools, their pictures, and what they are used for, let us decorate our first cake.
How to frost a cake
To say to frost a cake means to decorate a cake.
Frosting is the thick, fluffy mixture that is used to decorate our cakes and cupcakes. It is the stuff that holds shape on your cakes and looks pretty in various designs
Sometimes, frosting and icing on a cake are used interchangeably but in the real sense, they are very different. Frosting is generally thicker and fluffier than icing. Frosting’s main ingredients are fat and (butter or cream) and they are always whipped. Icing on the hand is thinner and tends to set quickly and harden when dry. Icing is generally not spreadable like frosting. Icing’s main ingredient is sugar and it is always mixed.
If you describe something as the frosting on the cake (icing on the cake), you mean that it is an extra good thing that makes a good situation or activity even better. It implies that you got to know how to frost a cake very well. Decorating a cake is the art form in cake making and we have explained below the best way to frost a cake, a foundation in cake decoration.
I usually work with American buttercream because it’s my favorite frosting to eat, but this tutorial can be used with any type of buttercream from Russian to Swiss Meringue.
A well-good frost cake should have crisp corners and smooth edges. In this how-to frost a cake tutorial, I am going to show you how to get a perfect cake.
Prep your cake
Make an attempt to chill your cake layers for a few hours before you start to spread frosting on your cake. Warm cakes would not naturally bond well with frost. If it comes out of the fridge, ensure you bring it to room temperature by allowing it to stay for a while outside, say an hour. Then use a serrated knife to trim off any peaks from the tops of your cake so they lie flat and even. I always use this period to test my cake from the slice cuts I make to achieve a level cake.
Tools needed
A spatula and some parchment paper will be good to have. A rotating cake turntable would also help achieve a satiny good finish. A cake board will also be needed to carry your cake to its final point. An icing smoother will be a good investment here. To decorate it further, we need a piping tip and a bag.
Buttercream frosting
The frosting we will be using in this tutorial is vanilla buttercream. Make sure all your ingredients are at room temperature before you start. Buttercream frosting can be made up to two weeks ahead and stored in the refrigerator. Just make sure you bring it to room temperature before frosting your cake. This is the method I normally use to prep my vanilla buttercream.
In a metal bowl, mix 4 egg whites with a pinch of salt and 1 cup sugar. Set the bowl over a pot with an inch of simmering water and whisk the mixture over low heat until the sugar dissolves. Remove the bowl from the heat and beat with an electric mixture until stiff peaks form. Beat in 3 sticks of softened unsalted butter, one spoonful at a time until the buttercream is smooth. Then, beat in whatever flavoring you like to use, like vanilla extract, which I use often. You still have the option to add lemon juice or brandy.
The first thing we are going to do is to frost the top of the cake. I normally use a cup to fetch my frosting from the bowl. I use the spatula to smooth the frosting on top of the cake. And when you are working on it, be sure to push it off towards the edges. We would then try to get the top as smooth as possible (though we gonna come back later for more dressing).
In other to add frosting on the side of the cake, we will use an icing tip and an icing bag to apply the frosting on the side of the cake. Try to put an even pressure as you work your way around the cake. We are going to start from the bottom and walk our way to the top. It is really helpful to have a turntable for this step so that you can hold the icing bag and turn the cake on the turntable.
I love to have one more layer of frosting at the top. The reason for that is we want to have a lip of frosting that sticks above the top edge of the cake.
Now we would have to take out our icing smoother and rest it on our cardboard cake circle as flat as we can. This is to make sure that we are getting a straight edge. When you start smoothing your side cake with the icing smoother, apply medium pressure. Digging into the frosting a little bit will help achieve a good smooth and also help fill in the gaps where it is lighter.
If you notice that there are holes or gaps as you smooth the sides, you can easily use your spatula to fetch more frosting and fill in the spots. The next thing we going to work on is the corners. This is actually where it’s kind of a make or breaks with your smooth cake. The better the corners, the better it looks. Here, I like to make sure that my offset spatula is nice and clean. We will carefully bring the frosting in and try to get a level with the cake. With every couple of pulls, the spatula needs to be cleaned yet again to make sure it’s nice and smooth, and ready to go.
Now as I mentioned earlier, the frosting that I added lastly on the side top will help in filling the top to get an even level. So now at this point, I like to give my cake a deeper look from an eye level. You can go ahead and fix any imperfections at this point if you see them.
By now, our cake is hugely transformed into a crusting cake.
So let us move on to decorate the cake further with a simple modest flower design on the top.
Grab your piping bag and your piping tips. Get frosting inside the bag.
I like to start with the inside of the cake and continue to make the flower design around the cake.
Then we can finish this buttercream cake with some sprinkles.
A good sprinkle mix goes a long way on a beautiful cake like ours.
Sprinkle it everywhere. Get it everywhere.
There it is. There’s my smooth frosting tutorial for beginners and also chefs that need to do more in their art of baking.
I hope you found this helpful.